一. 背景
自动化部署就是为了解放生产力。
二. CI部署
Jenkins与Github集成
Github Hooks
配置Github项目仓库,Github项目仓库在处理这些动作的同时会发送信号至Jenkins触发自动构建操作。
生成Personal Access Token
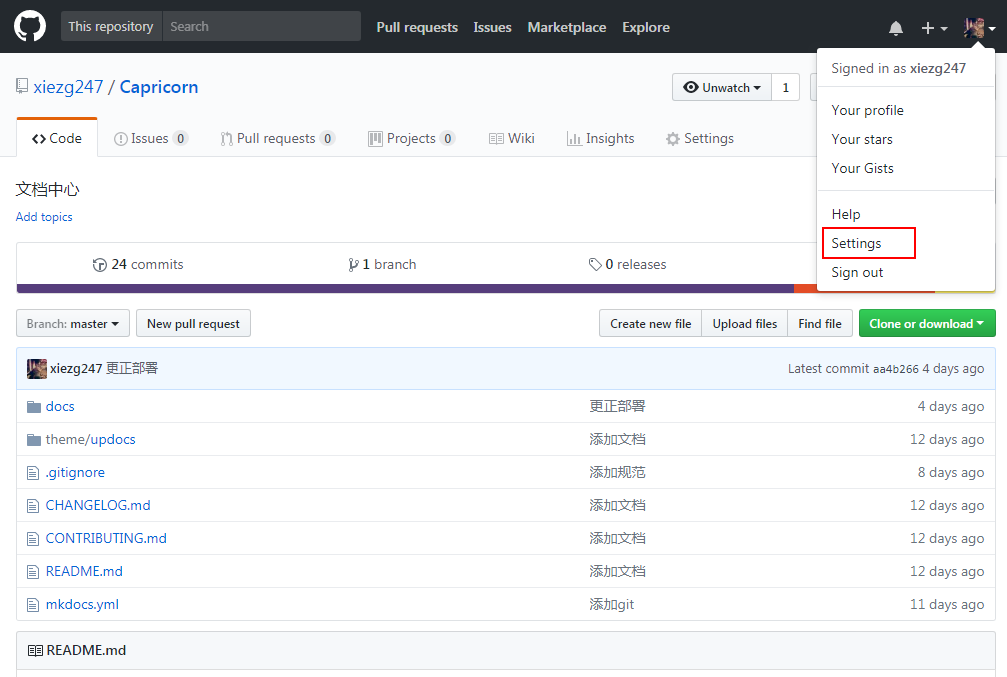
- 登录Github,在头像上点击settings
- 点击Developer settings下的Personal access tokens
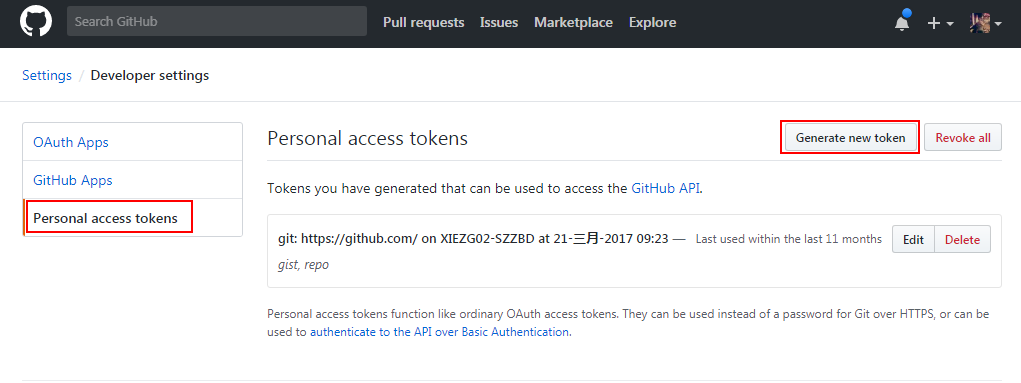
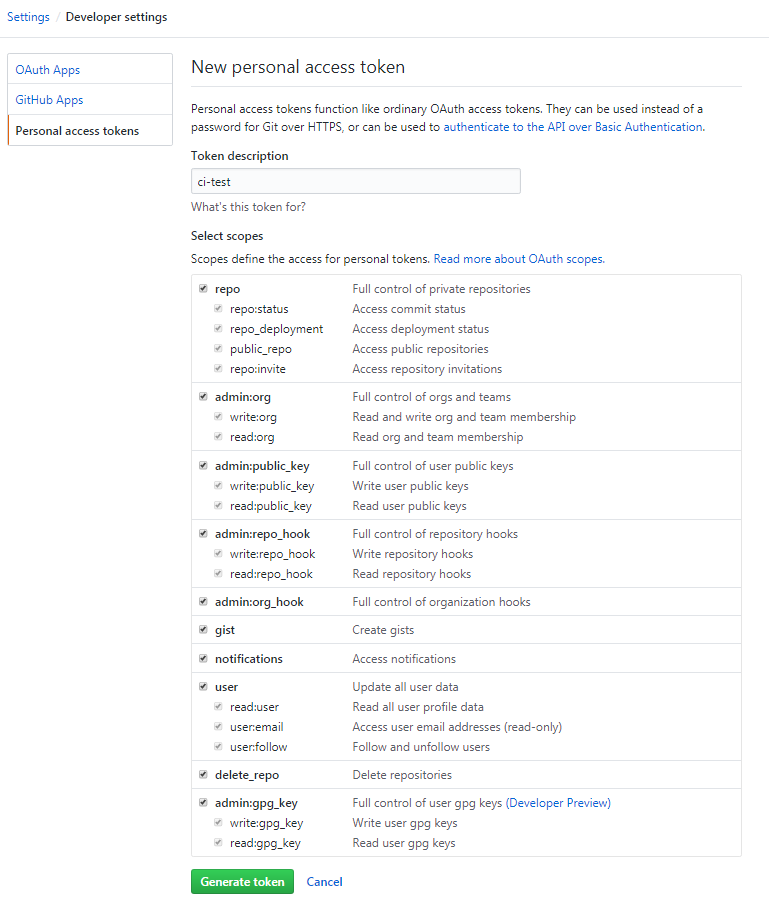
- 点击Generate new token,在Token description中填一个描述名称,下面的复选框是这个token需要的权限,按照需要的权限勾上。
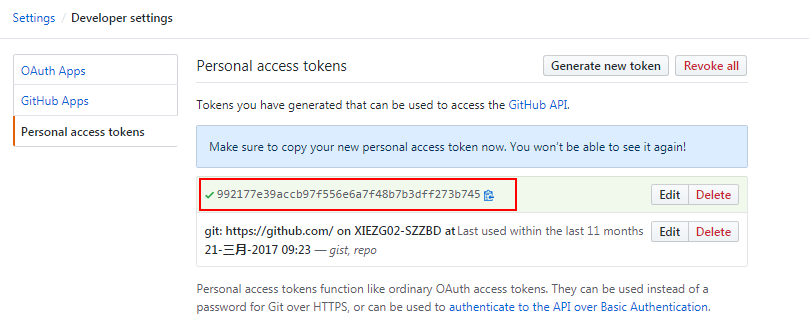
- token可复制使用
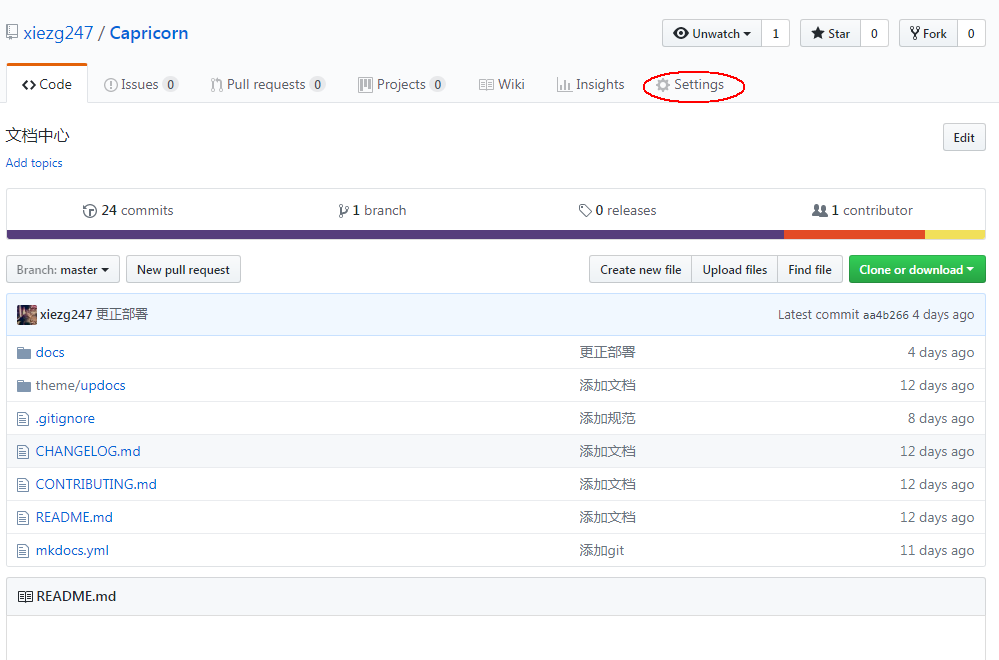
配置Github项目仓库
上面的Token是属于账户级的东西,Webhooks是项目级别的。当项目发生了某个事件,Github会给一个指定的url发Post请求。
- 点击项目仓库的settings
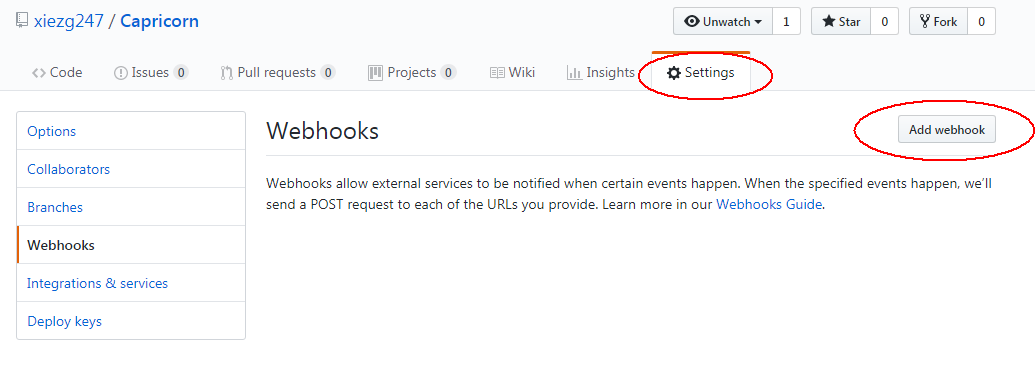
- 在Webhooks选项卡中,点击Add webhook
- 将在Jenkins生成的Hook URL填入至Payload URL中,选择自主事件,当Github收到了客户端有Push/Pull Request动作时,会触发一个Hook
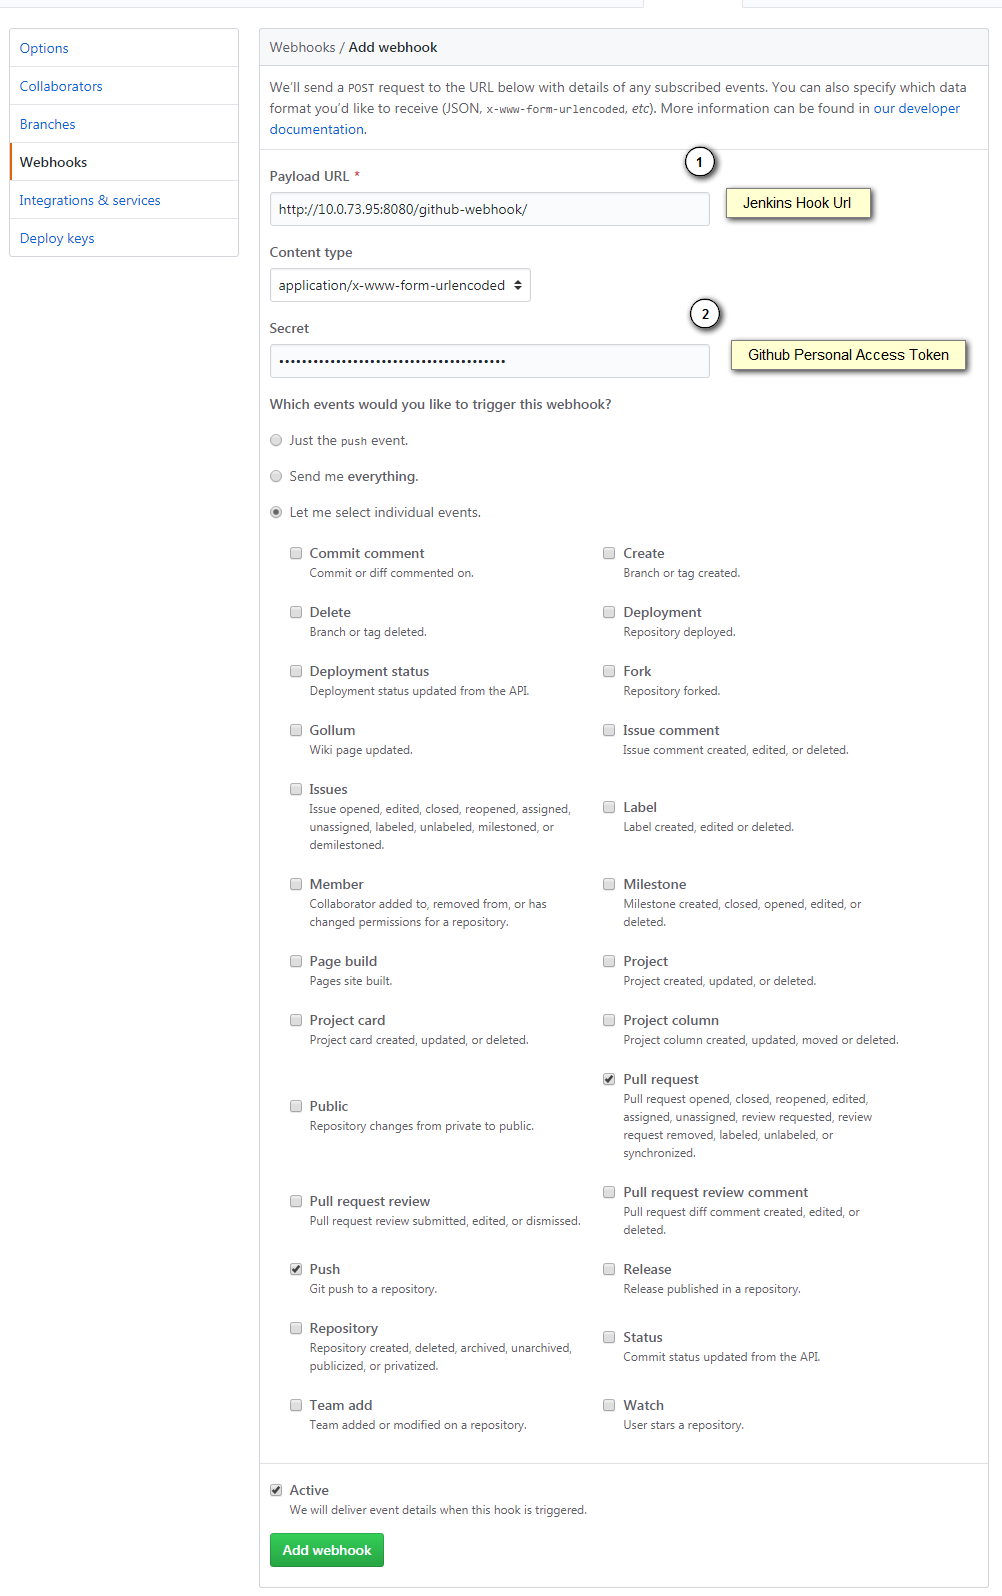
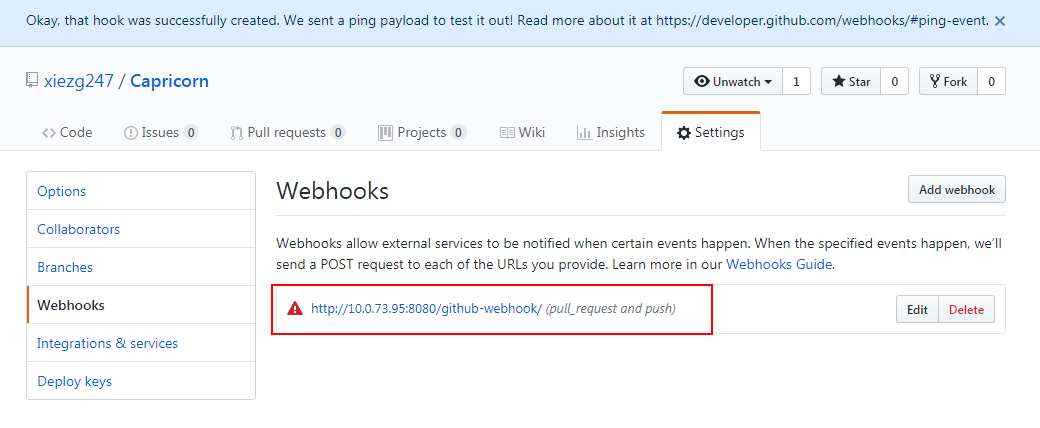
- 保存WebHook
Jenkins安装
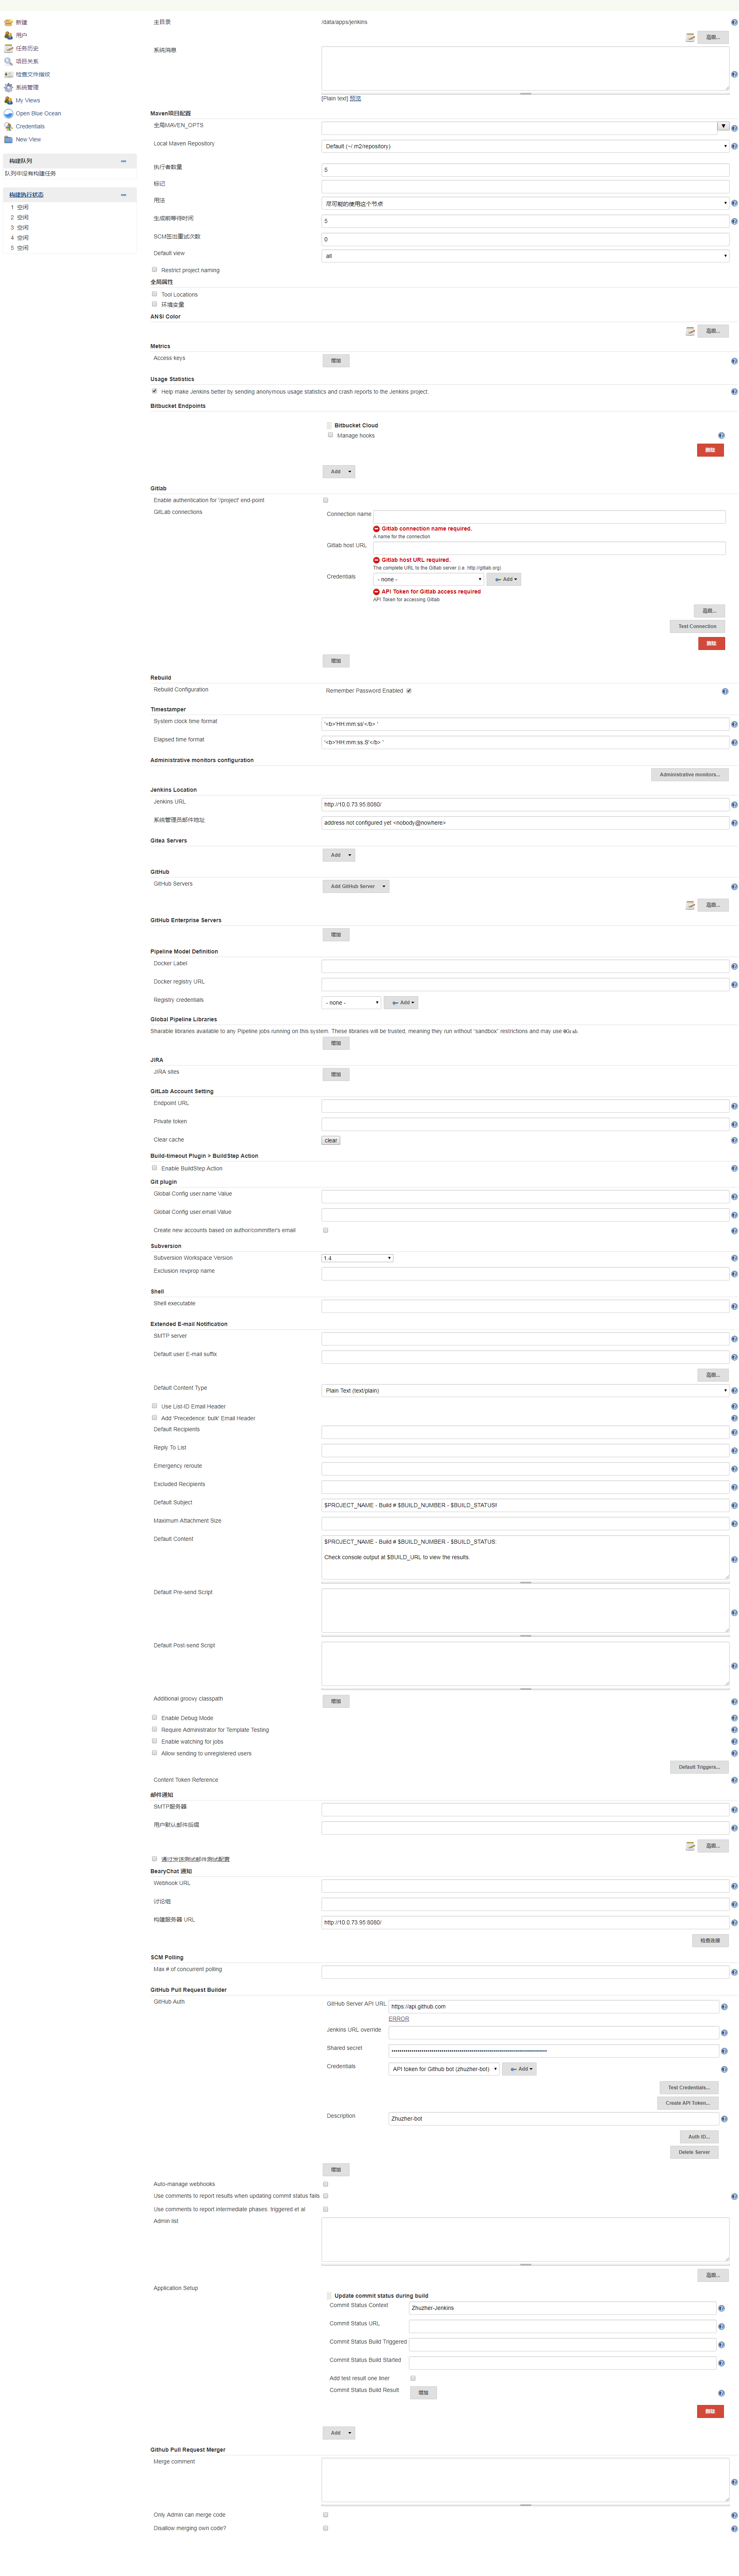
Jenkins全局配置
Jenkins项目配置
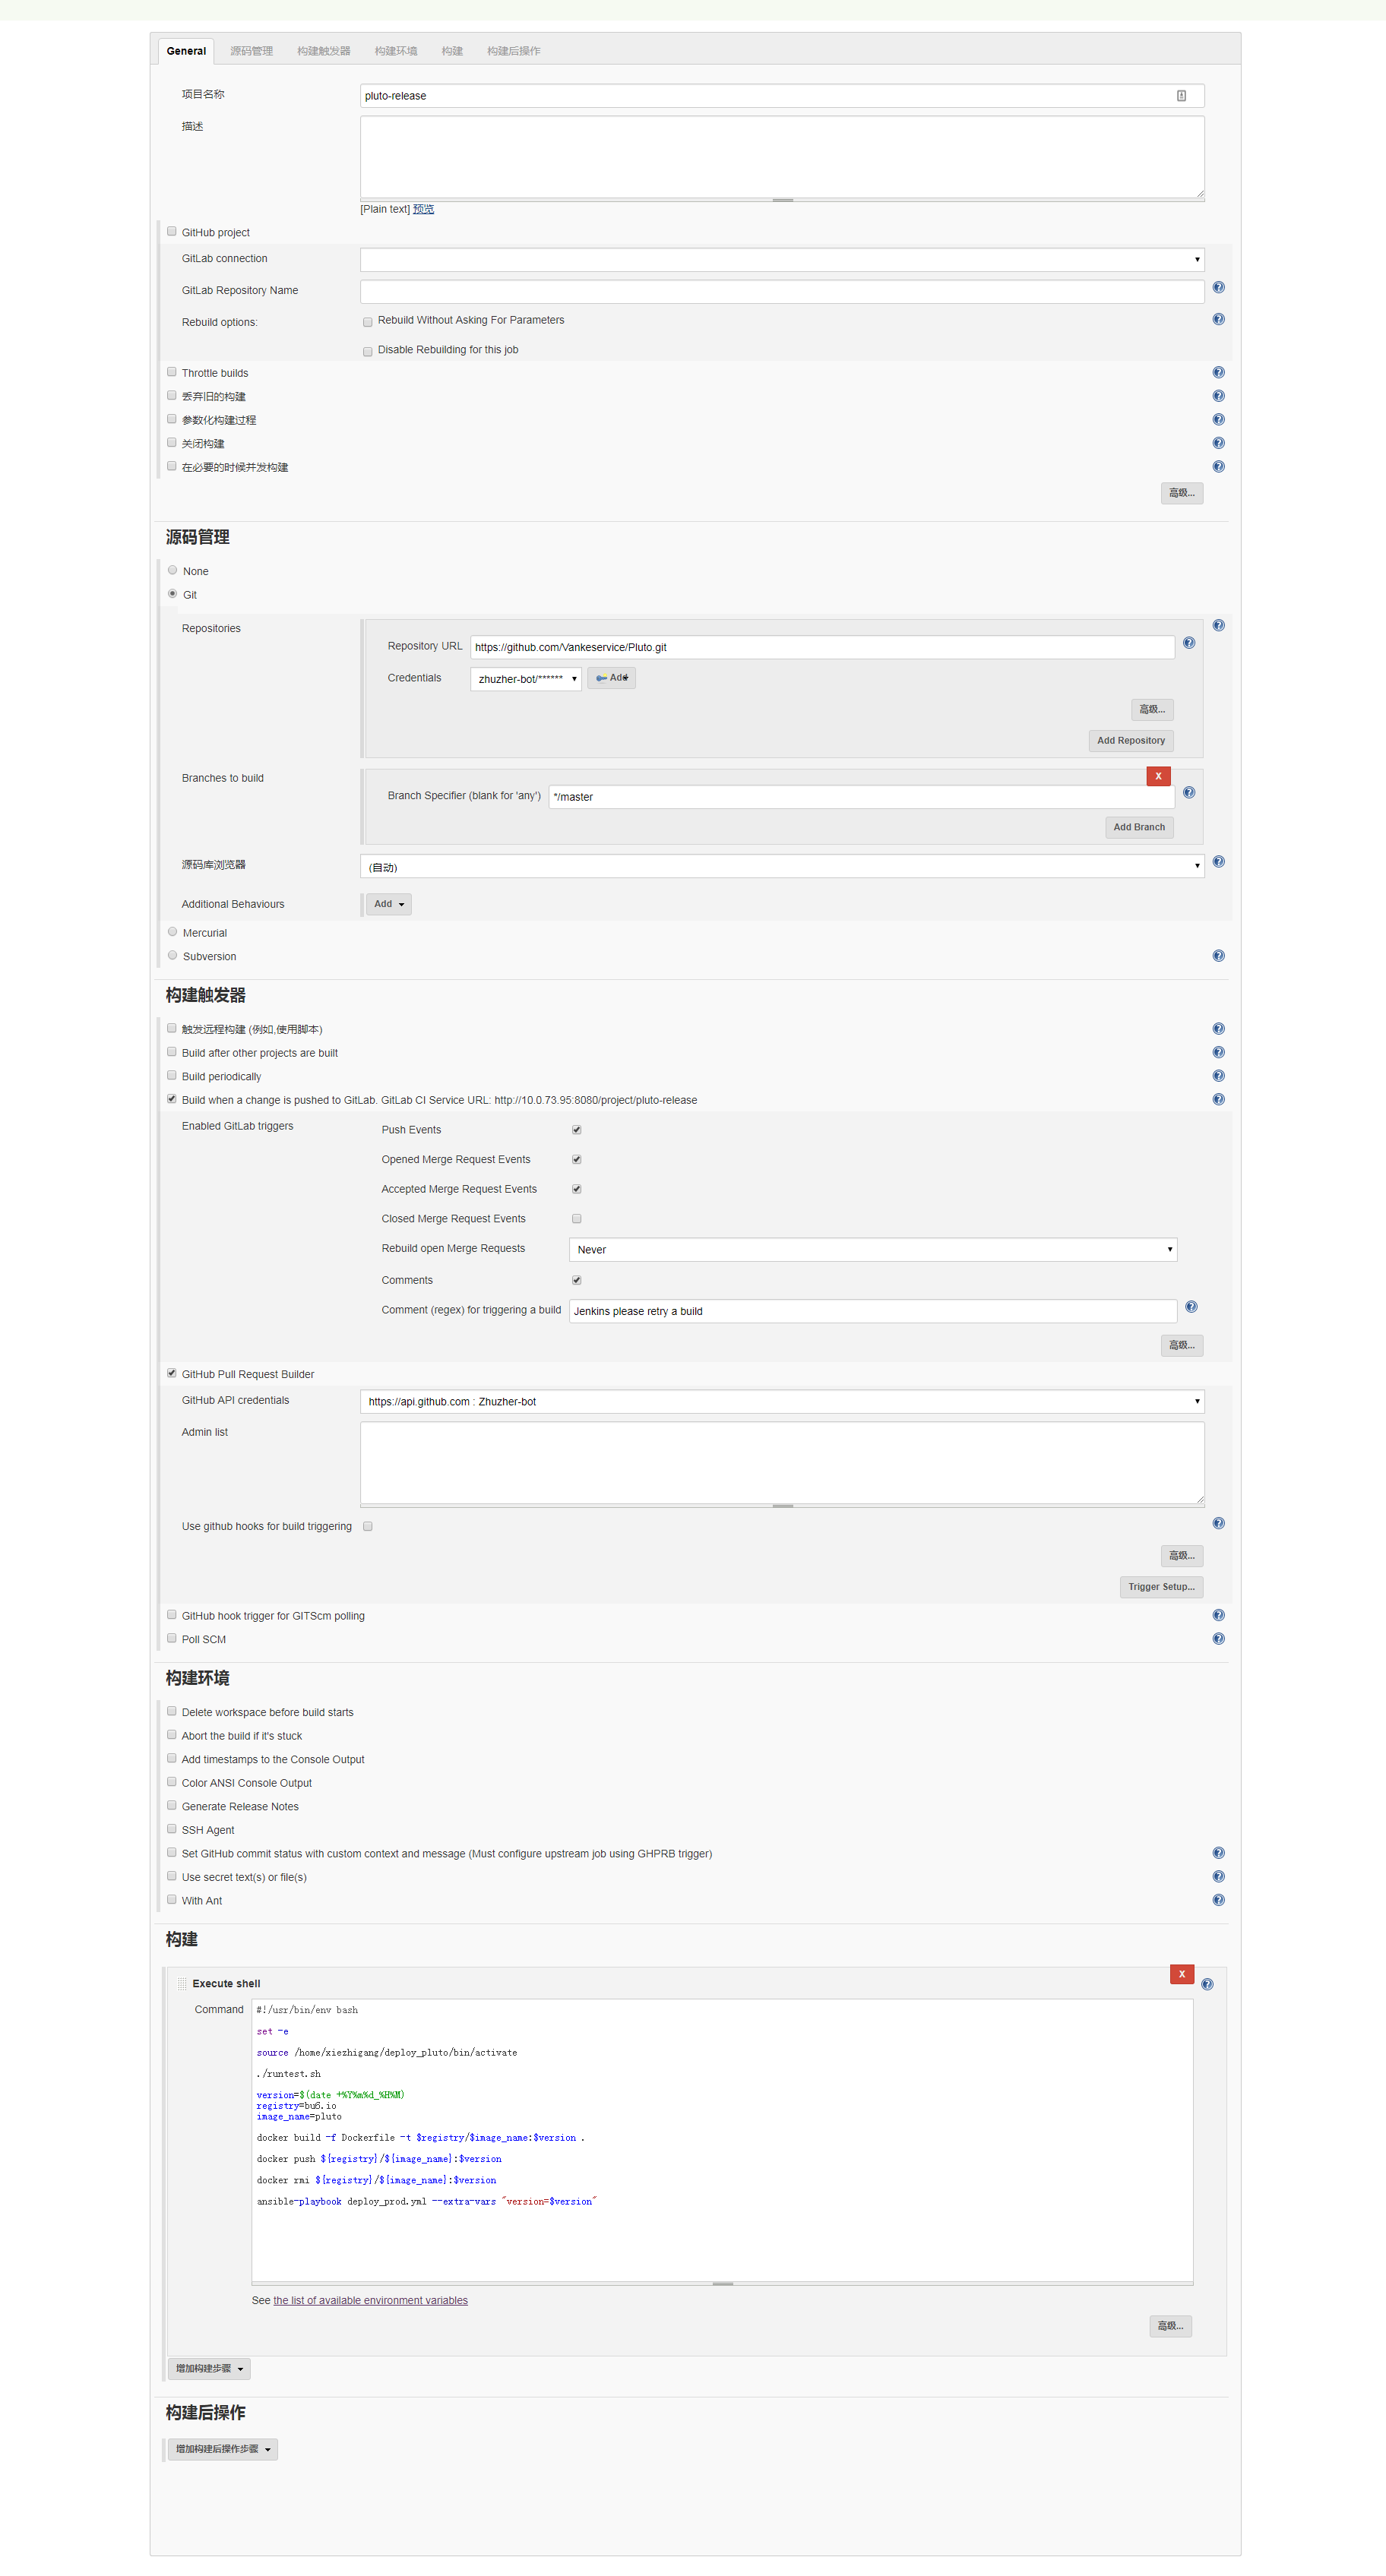
Jenkins执行脚本分析
1
2
3
4
5
6
7
8
9
10
11
12
13
14
15
16
17
18
19
#!/usr/bin/env bash

set -e

source /home/xiezhigang/deploy_pluto/bin/activate

./runtest.sh

version=$(date +%Y%m%d_%H%M)
registry=bu6.io
image_name=pluto

docker build -f Dockerfile -t $registry/$image_name:$version .

docker push ${registry}/${image_name}:$version

docker rmi ${registry}/${image_name}:$version

ansible-playbook deploy_prod.yml --extra-vars "version=$version"
从执行命令可以知道几点:
- 需要安装了ansible的python虚拟环境(一般在jenkins服务器上面配置)
- 需要安装了docker的环境
- 需要docker registry镜像服务器
- 需要在项目中写好了dockerfile/deploy_prod.yml配置文件
三. 项目结构
1
2
3
4
5
6
7
8
9
10
11
12
13
14
15
16
17
18
19
20
21
22
23
24
25
26
27
28
29
30
31
32
33
34
35
36
37
38
39
40
41
42
43
44
45
46
47
48
49
50
51
52
53
54
55
56
57
58
59
60
61
62
63
64
65
66
67
68
69
70
71
72
73
74
75
76
77
78
.
├── alembic  // alembic环境
│   ├── env.py
│   ├── env.pyc
│   ├── README
│   ├── script.py.mako
│   └── versions
├── alembic.ini  // alembic配置
├── ansible.cfg  // ansible配置
├── celerybeat-schedule
├── common  // 共用模块
│   ├── __init__.py
│   ├── README.md
│   ├── rpc
│   └── tingyun
├── config  // 环境变量
│   ├── dev
│   ├── prod
│   ├── stage
│   └── test
├── deploy_prod.yml  // ansible playbook正式环境配置
├── deploy_test.yml  // ansible playbook测试环境配置
├── Dockerfile  // dockerfile配置
├── docs  // 文档
│   ├── about.md
│   └── index.md
├── gunicorn_config.py  // gunicorn配置
├── hosts.ansible.cfg  // ansible的主机配置
├── manage.py
├── migrations  // alembic脚本
│   ├── alembic.ini
│   ├── env.py
│   ├── env.pyc
│   ├── README
│   ├── script.py.mako
│   └── versions
├── mkdocs.yml  // mkdocs配置
├── pluto  // 项目主体
│   ├── app.py
│   ├── app.pyc
│   ├── config.py
│   ├── config.pyc
│   ├── corelibs
│   ├── exc
│   ├── forms
│   ├── __init__.py
│   ├── __init__.pyc
│   ├── models
│   ├── static
│   ├── tasks
│   ├── templates
│   ├── utils
│   ├── views
│   ├── wsgi.py
│   └── wsgi.pyc
├── Procfile  // honcho配置
├── README.md
├── requirements.txt
├── runserver.sh
├── runtest.sh
├── scripts
│   ├── cron
│   ├── __init__.py
│   └── once
├── setup.cfg
├── site
│   ├── about
│   ├── css
│   ├── fonts
│   ├── img
│   ├── index.html
│   ├── js
│   ├── mkdocs
│   ├── search.html
│   └── sitemap.xml
└── tests
    └── __init__.py
四. 部署脚本
Docker
Docker File
项目的Dockerfile如下:
1
2
3
4
5
6
7
8
9
10
11
12
13
14
15
16
17
18
FROM bu6.io/python2.7
MAINTAINER  xiezhigang "xiezg02@vanke.com"
LABEL version="1.0"
LABEL description="优惠券中心测试环境"

# 重要:设置image的时区
ENV TZ=Asia/Shanghai
ENV PYTHONPATH="${PYTHONPATH}:/usr/src/app"
ENV prometheus_multiproc_dir="/tmp/prometheus-metrics"
RUN ln -snf /usr/share/zoneinfo/$TZ /etc/localtime && echo $TZ > /etc/timezone

WORKDIR /usr/src/app

COPY requirements.txt /usr/src/app/
RUN mkdir /tmp/prometheus-metrics
RUN pip install -i https://mirrors.ustc.edu.cn/pypi/web/simple --no-cache-dir -r requirements.txt
COPY . /usr/src/app
Docker Registry
Docker Compose
待补充
Ansible
Ansible
- Ansible中文权威指南
Ansible Playbook
- 最佳实践
项目中应用到的配置:
- ansible.cfg ```yaml [defaults] inventory=./hosts.ansible.cfg
1
2
3
4
5
6
7
8
9
10
11
12
2. hosts.ansible.cfg
```yaml
[pluto.test]
192.168.0.92

[pluto.migrate]
192.168.0.169

[pluto.prod]
192.168.0.169
192.168.0.208
- deploy_prod.yml
```yaml
- hosts: pluto.migrate remote_user: deploy tasks:
- name: run migration shell: docker run –name run_migraion –rm bu6.io/pluto:’’ honcho -e config/prod/env run python manage.py db upgrade head
- hosts: pluto.prod
remote_user: deploy
tasks:
-
name: stop container shell: docker stop pluto_prod_worker || true
-
name: stop container shell: docker stop pluto_prod_beat || true
-
name: stop container shell: docker stop pluto_prod_web || true
-
name: remove images shell: docker rmi $(docker images -f reference=’bu6.io/pluto’) || true
-
name: run celery worker shell: docker run –log-driver fluentd –log-opt fluentd-address=192.168.0.24:24224 –log-opt tag=pluto_prod_worker –log-opt fluentd-async-connect=true –name pluto_prod_worker -ti -d –rm bu6.io/pluto:’’ honcho -e config/prod/env run celery worker -A pluto.corelibs.async.celery_worker –loglevel=INFO -c 20 -P gevent -Q pluto,celery
-
name: run celery beat shell: docker run –log-driver fluentd –log-opt fluentd-address=192.168.0.24:24224 –log-opt tag=pluto_prod_beat –log-opt fluentd-async-connect=true –name pluto_prod_beat -ti -d –rm bu6.io/pluto:’’ honcho -e config/prod/env run celery beat -A pluto.corelibs.async.celery_worker –loglevel=INFO
-
name: run pluto shell: docker run –log-driver fluentd –log-opt fluentd-address=192.168.0.24:24224 –log-opt tag=pluto_prod_web –log-opt fluentd-async-connect=true –name pluto_prod_web -ti -d –rm -p 0.0.0.0:8089:8080 bu6.io/pluto:’’ honcho -e config/prod/env run gunicorn -c gunicorn_config.py -k gevent -t 10 -w 10 -b “0.0.0.0:8080” pluto.wsgi:application
-
name: check url get_url: url=http://localhost:8089/_internal/ping timeout=30 dest=/dev/null
-
```
五. 优化
待补充
六. 总结
待补充